
ここで紹介する内容は、弊社で確認した一例です。
本ページを参考に作業をされ、何らかのトラブルや損失・損害等が発生しましても一切責任を負えません。自己責任でお願いします。
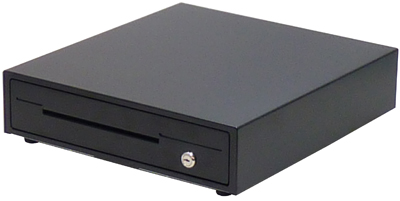
弊社製品のLANドロアはソケット通信を使用して制御します。
ソケット通信はPHP言語でもできるので、PHPのフレームワークの1つである、CakePHPを使用してLANドロアを制御してみました。
テスト環境
OS:Windows10 64bit
xampp:5.6.39
PHP:7.2.13
CakePHP:3.7
CakePHPのインストール
予め、xamppとComposerはインストールしておきます。
今回のテスト環境はWindowsのため、Composer-Setup.exeを使用してComposerをインストールします。
OpenSSLが無効になっているとインストール中に警告が出ることがあるため、php.iniで「extension=php_openssl.dll」を有効にしてください。
以下のコマンドにより、Composerが正常にインストールされたことを確認できます。
composer -V 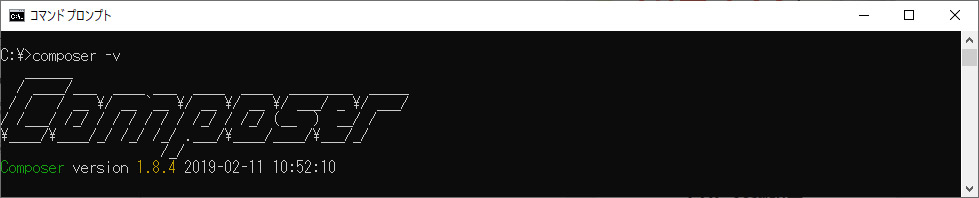
xamppとComposerの準備ができたら、コマンドプロンプトで下記コマンドを実行し、CakePHPをダウンロード・インストールします。
CakePHPはxamppで設定したドキュメントルートにダウンロードします。
(xamppのドキュメントルートはCドライブにxamppをインストールした場合、「c:\xampp\htdocs」になります。)
コマンドプロンプトで、CakePHPをダウンロードするディレクトリに移動し、下記コマンドを実行します。
composer create-project --prefer-dist cakephp/app [プロジェクト名]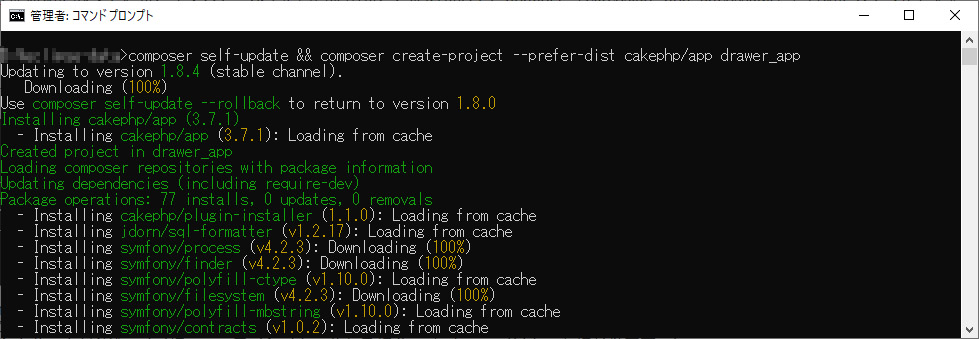
コマンド実行中に
Set Folder Permissions ? (Default to Y) [Y,n]?上記が表示されるので、「Y」を入力します。
これでCakePHPのインストールが終了します。
インストールの確認
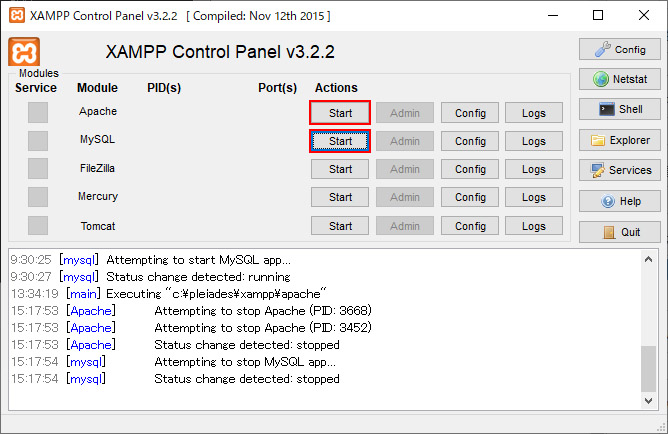
xampp-controlを起動し、「Apache」と「MySQL」を「Start」させます。
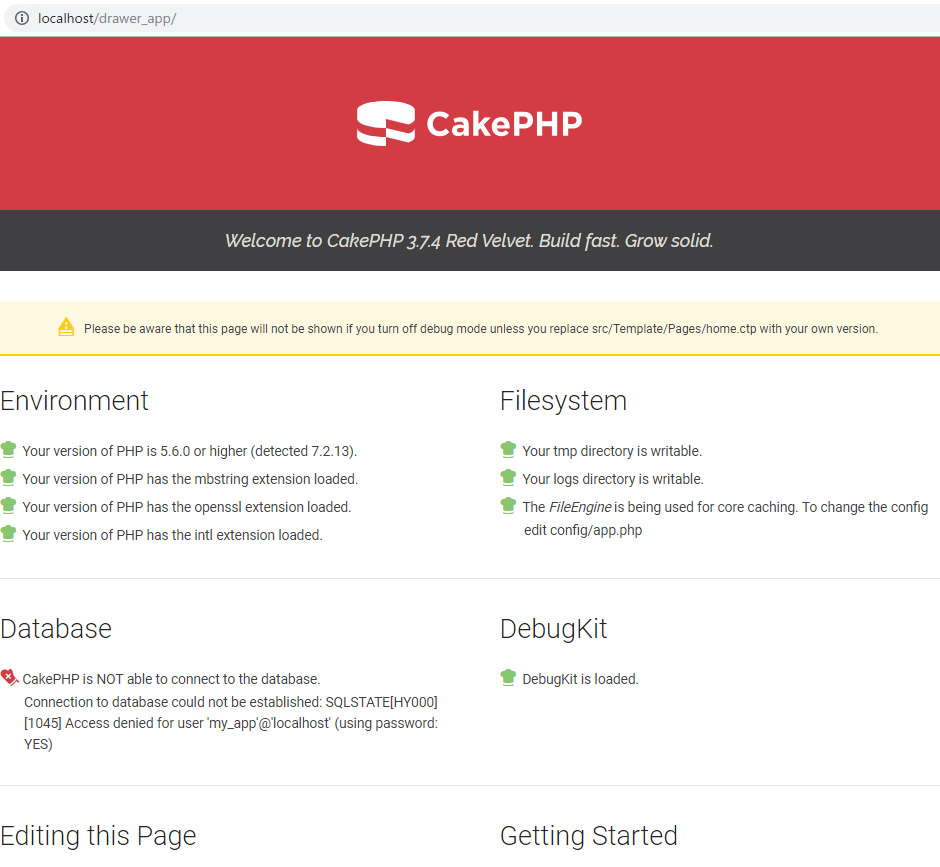
「http://localhost/[プロジェクト名]」にアクセスすると、以下のトップ画面が表示されます。
データベースの設定
作成したプロジェクトで使うDBを設定していきます。
DBの作成がまだの場合は、例えば drawerappdb のような名前で、プロジェクトで使用する空のデータベースを 作成してください。
必要なテーブルを作成するために、以下のようにSQL を実行して下さい。
USE drawerappdb;

CREATE TABLE draweractions(
    id INT AUTO_INCREMENT PRIMARY KEY,
    ipaddress VARCHAR(255) NOT NULL,
    portno VARCHAR(255) NOT NULL
);
config/app.phpを開き、以下を修正します。
'Datasources' => [
'default' => [
'className' => 'Cake\Database\Connection',
'driver' => 'Cake\Database\Driver\Mysql',
'persistent' => false,
'host' => 'localhost',
/*
* CakePHP will use the default DB port based on the driver selected
* MySQL on MAMP uses port 8889, MAMP users will want to uncomment
* the following line and set the port accordingly
*/
//'port' => 'non_standard_port_number',
'username' => 'ユーザー名', //変更してください
'password' => 'パスワード', //変更してください
'database' => 'データベース名', //変更してください
/*
* You do not need to set this flag to use full utf-8 encoding (internal default since CakePHP 3.6).
*/
//'encoding' => 'utf8mb4',
'timezone' => 'タイムゾーン', //変更してください
'flags' => [],
'cacheMetadata' => true,
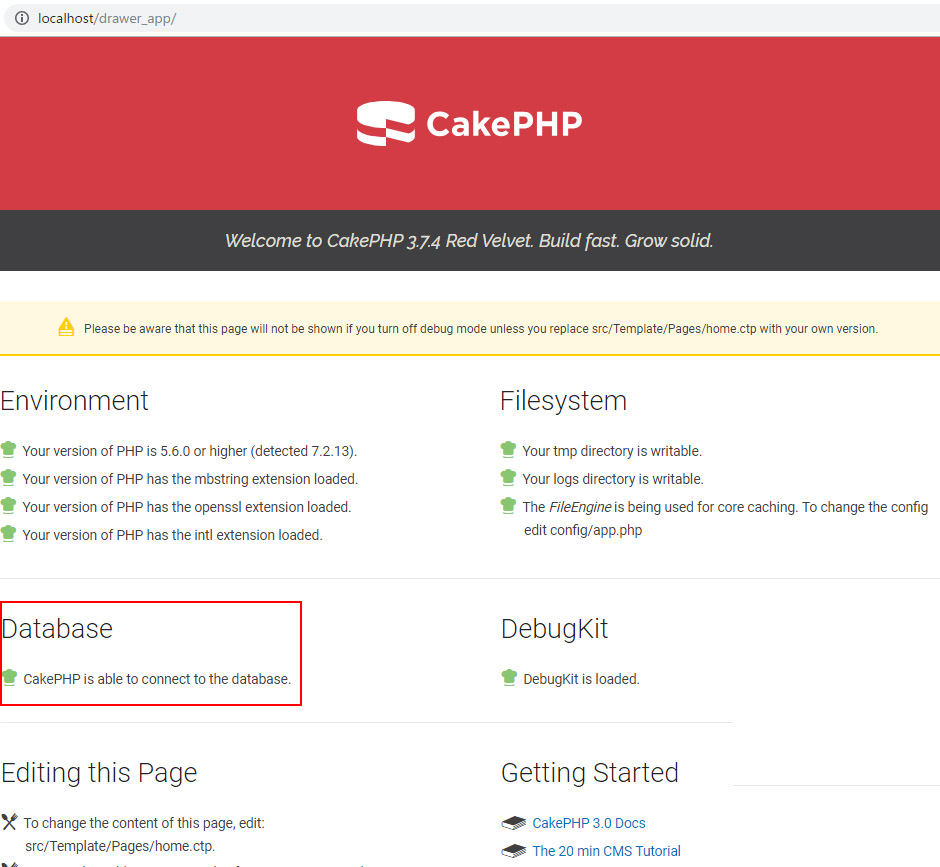
'log' => false,app.phpを修正・保存し、「http://localhost/[プロジェクト名]」にアクセスするとDatabaseのエラー表示が直っていることが確認できます。
model, view, controllerの作成
CakePHPのbakeコマンドを使って、スケルトンコードを作成します。
コマンドプロンプトで、プロジェクトを作成したディレクトリに移動し、下記コマンドを実行します。
bin\cake bake all draweractions
addのテンプレートの変更
src\Template\Draweractions\add.ctpを開き、以下のように修正します。
<?php
/**
 * @var \App\View\AppView $this
 * @var \App\Model\Entity\Draweraction $draweraction
 */
?>
<nav class="large-3 medium-4 columns" id="actions-sidebar">
    <ul class="side-nav">
        <li class="heading"><?= __('Actions') ?></li>
        <li><?= $this->Html->link(__('インデックスに戻る'), ['action' => 'index']) ?></li>
    </ul>
</nav>
<div class="draweractions form large-9 medium-8 columns content">
    <?= $this->Form->create($draweraction) ?>
    <fieldset>
        <legend><?= __('接続するLANドロアの追加') ?></legend>
        <p>接続するLANドロアのIPアドレスとポート番号を入力し、登録してください。</p>
        <?php
            echo $this->Form->control('ipaddress',['label' => __('IPアドレス')]);
            echo $this->Form->control('portno',['label' => __('ポート番号')]);
        ?>
    </fieldset>
    <?= $this->Form->button(__('登録')) ?>
    <?= $this->Form->end() ?>
</div>
「http://localhost/drawer_app/draweractions/add」にアクセスすると下記のような入力画面が表示されます。
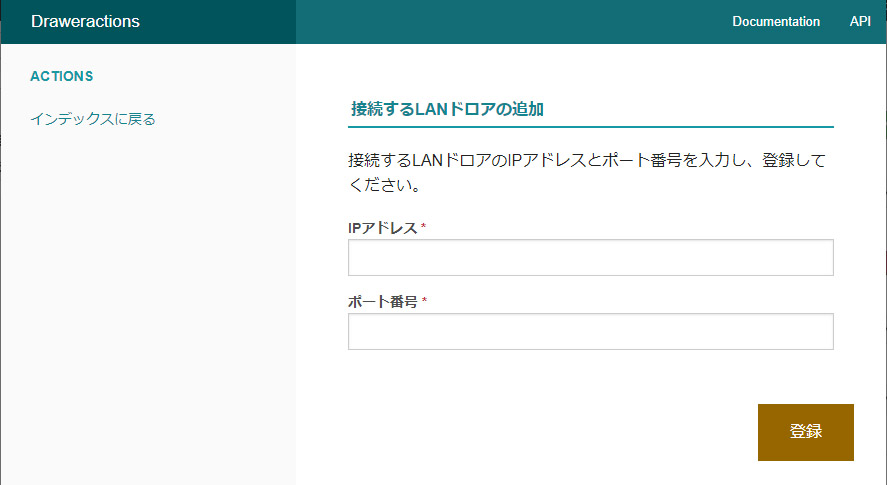
接続するLANドロアのIPアドレスとポート番号を入力し、登録ボタンをクリックします。
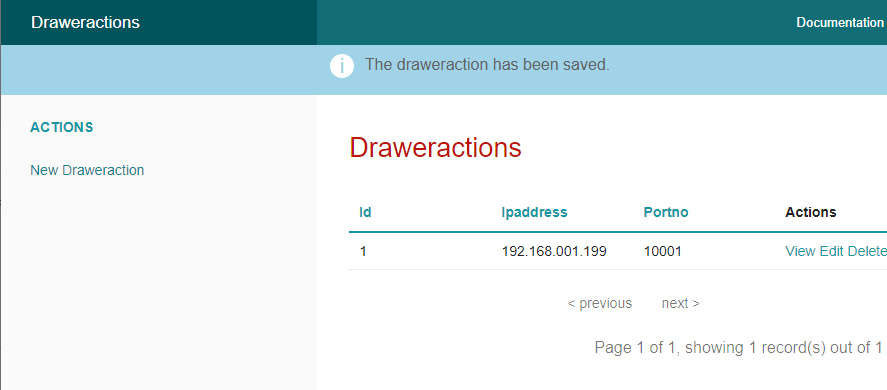
IPアドレスとポート番号が保存され、「http://localhost/drawer_app/draweractions/」にリダイレクトされます。
indexのテンプレートの変更
src\Template\Draweractions\index.ctpを開き、以下のように修正します。
<?php
/**
 * @var \App\View\AppView $this
 * @var \App\Model\Entity\Draweraction[]|\Cake\Collection\CollectionInterface $draweractions
 */
?>
<nav class="large-3 medium-4 columns" id="actions-sidebar">
    <ul class="side-nav">
        <li class="heading"><?= __('Actions') ?></li>
        <li><?= $this->Html->link(__('New Draweraction'), ['action' => 'add']) ?></li>
    </ul>
</nav>
<div class="draweractions index large-9 medium-8 columns content">
    <h3><?= __('Draweractions') ?></h3>
        <?= $this->Form->create($draweractions) ?>
    <fieldset>
    <table cellpadding="0" cellspacing="0">
        <thead>
            <tr>
                <th scope="col"><?= $this->Paginator->sort('id') ?></th>
                <th scope="col"><?= $this->Paginator->sort('ipaddress') ?></th>
                <th scope="col"><?= $this->Paginator->sort('portno') ?></th>
                <th scope="col"><?= __('ドロア操作') ?></th>
                <th scope="col" class="actions"><?= __('Actions') ?></th>
            </tr>
        </thead>
        <tbody>
            <?php foreach ($draweractions as $draweraction): ?>
            <tr>
                <td><?= $this->Number->format($draweraction->id) ?></td>
                <td><?= h($draweraction->ipaddress) ?></td>
                <td><?= h($draweraction->portno) ?></td>
                <td>
                <!-- ドロアオープンボタン -->
                <?php
                	echo $this->Form->hidden('drawer_id[]',['value' => $this->Number->format($draweraction->id)]);
                	echo $this->Form->button('open', ['name'=>'open['.$draweraction->id.']']);
                ?>
                <!-- ドロアオープンボタン操作後のステータス取得 -->
				<p>ステータス:
				<?php
					$id = $this->Number->format($draweraction->id);
					if(isset($responce)){
						if($responce[1] == $id){
							echo $responce[0];
						}else{
							echo '';
						}
					}
				?>
				</p>
                </td>
                <td class="actions">
                    <?= $this->Html->link(__('View'), ['action' => 'view', $draweraction->id]) ?>
                    <?= $this->Html->link(__('Edit'), ['action' => 'edit', $draweraction->id]) ?>
                    <?= $this->Form->postLink(__('Delete'), ['action' => 'delete', $draweraction->id], ['confirm' => __('Are you sure you want to delete # {0}?', $draweraction->id)]) ?>
                </td>
            </tr>
            <?php endforeach; ?>
        </tbody>
    </table>
    <div class="paginator">
        <ul class="pagination">
            <?= $this->Paginator->first('<< ' . __('first')) ?>
            <?= $this->Paginator->prev('< ' . __('previous')) ?>
            <?= $this->Paginator->numbers() ?>
            <?= $this->Paginator->next(__('next') . ' >') ?>
            <?= $this->Paginator->last(__('last') . ' >>') ?>
        </ul>
        <p><?= $this->Paginator->counter(['format' => __('Page {{page}} of {{pages}}, showing {{current}} record(s) out of {{count}} total')]) ?></p>
    </div>
    </fieldset>
    <?= $this->Form->end() ?>
</div>
Controllerの変更
src\Controller\DraweractionsController.phpを開き、以下のように修正します。
/*以下3点追加*/
use Cake\ORM\TableRegistry;
use Cake\UTility\Hash;
use Cake\Network\Socket;

    /*変更するのはドロア操作をするindexのみ*/
    public function index()
    {
        $draweractions = $this->paginate($this->Draweractions);
        $this->set(compact('draweractions'));

        $this->Drawer = TableRegistry::get('draweractions');

        if (isset($this->request->data['open'])) {
            $button = $this->request->data['open'];
            $query = $this->Drawer->find('all');
            $data = $query->toArray();
            $key = key($button);
            $drawer_id = Hash::extract($data, '{n}.id');    /*登録されているIDを配列にして取得*/
            $search_id = array_search($key, $drawer_id);    /*ボタンが押されたドロアのIDと登録されいているドロアのIDを探す*/

            $ipaddress = Hash::get($data, $search_id.'.ipaddress'); /*ボタンが押されたカラムに登録されているIPアドレスを取得*/
            $portno = Hash::get($data, $search_id.'.portno');   /*ボタンが押されたカラムに登録されているポート番号を取得*/

            $socket = new Socket(); /*ドロアと通信する*/
            $socket->__construct(['host'=>$ipaddress, 'port'=>$portno, 'timeout' => 15]);
            $socket->write('$WO');  /*ドロアオープン*/

            $responce=$socket->write('$WS');    /*ドロアステータス取得*/
            $responce = $socket->read(2);

            if($responce == '1$'){
                $responce = 'Close';
            }
            else if($responce == '0$'){
                $responce = 'Open';
            }
            else{
                $responce = '';
            }

            $res_key=[$responce,$key];
            $this->set('responce', $res_key);
        }
    }
ドロアの操作
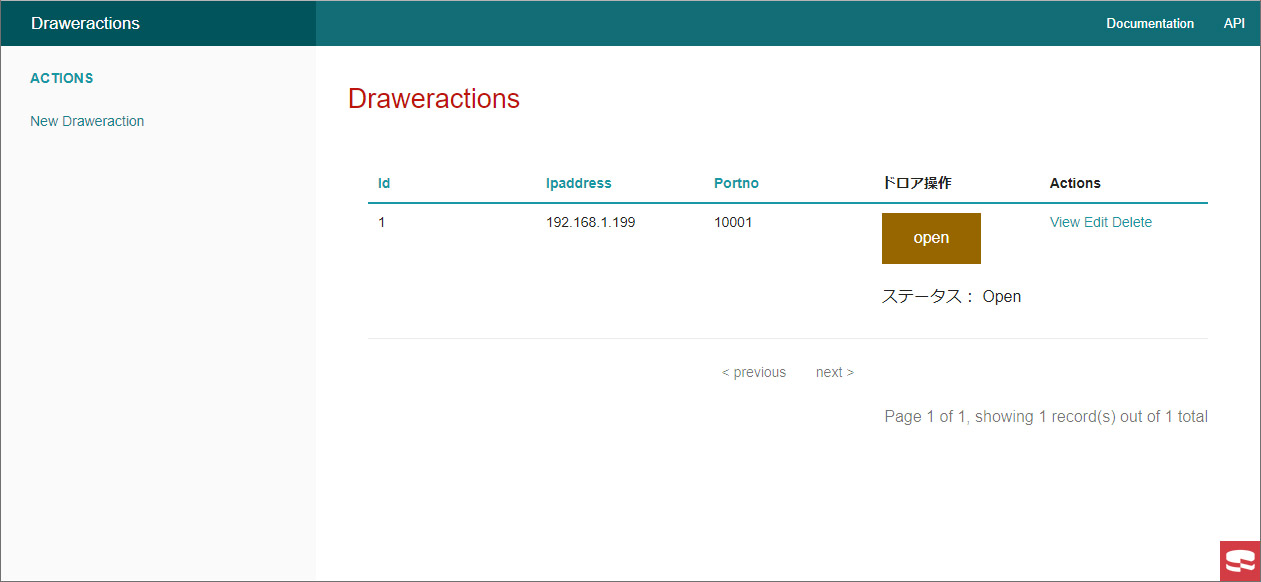
ブラウザで「http://localhost/drawer_app/draweractions/」の表示を確認します。
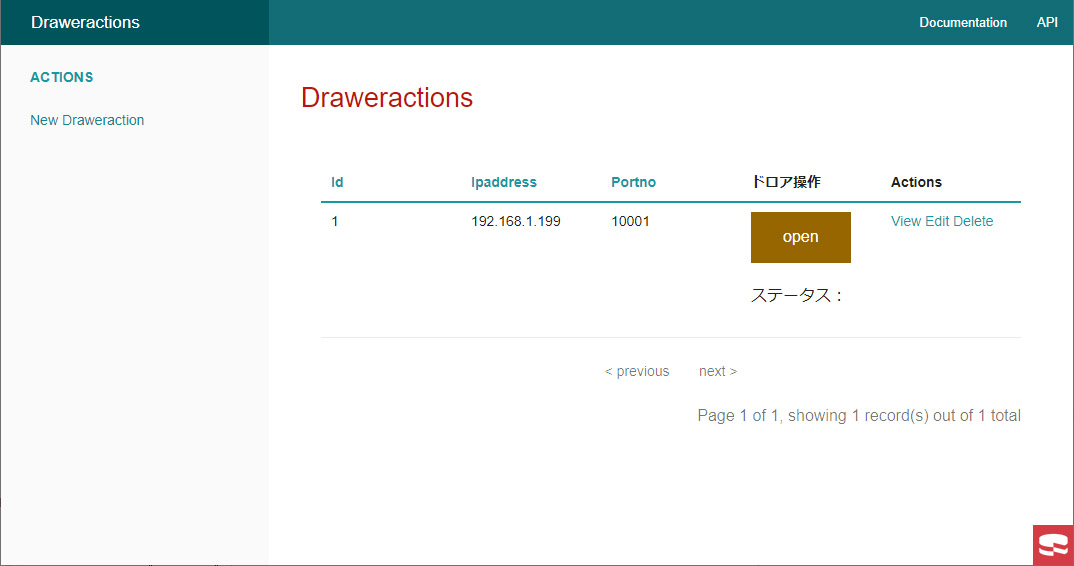
「open」ボタンをクリックすると、ドロアが繋がっていればドロアがオープンし、「ステータス:」の表示が「ステータス:Open」に変わります。
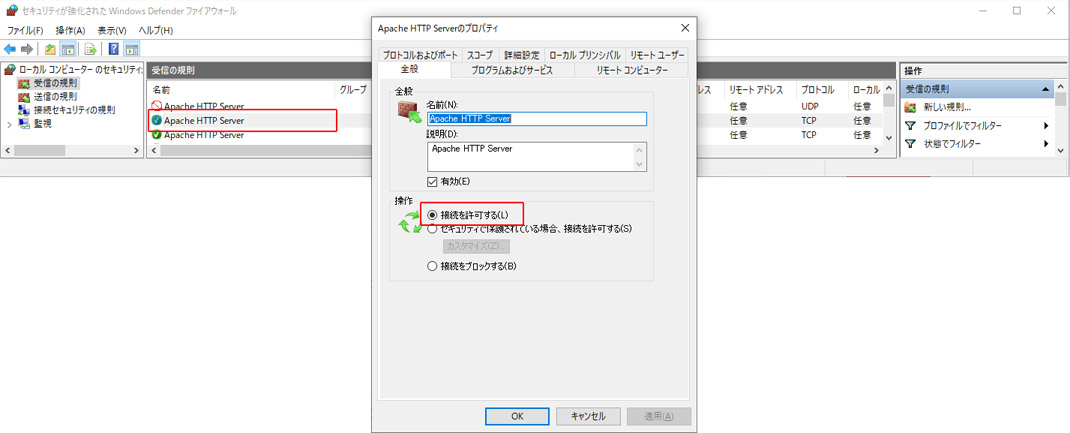
同じLAN内の他デバイスからドロアを操作する場合
ファイアウォールの設定で他デバイスからアクセスできるよう設定します。
「Windowsの設定」→「ネットワークとインターネット」→「Windowsファイアウォール」→「詳細設定」
「Apache HTTP Server」のプロトコルが「TCP」のものを接続許可にします。
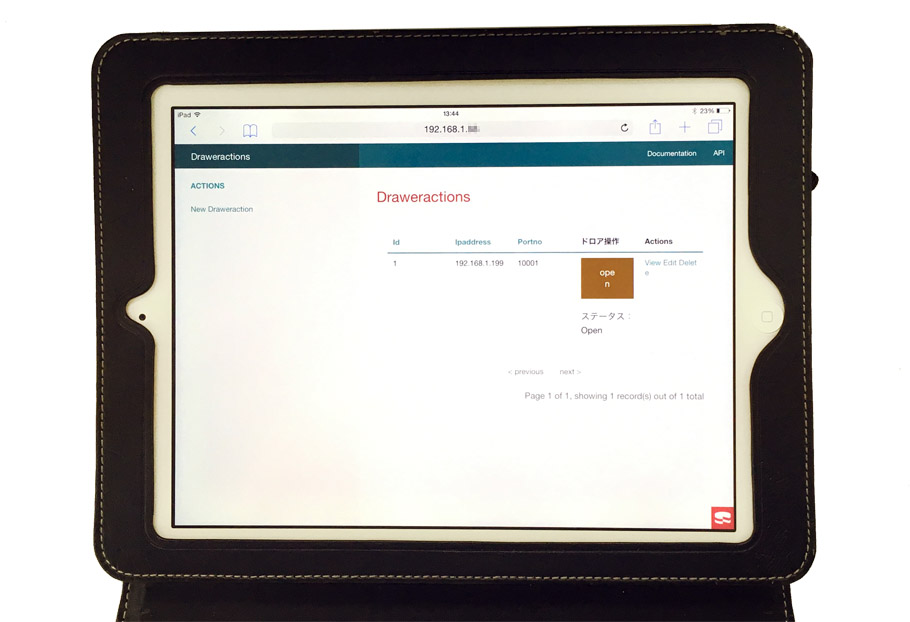
設定後、他デバイスのブラウザを起動します。
URLはxamppを動かしているPCのIPアドレスを使用します。
「http://IPアドレス/drawer_app/draweractions」になります。
((例)http://192.168.1.XXX/drawer_app/draweractions )
まとめ
今回はCakePHPで試しましたが、ソケット通信でコマンドを送信/受信できれば、プログラム言語・デバイスを問わずLANドロアを制御できます。
レシートプリンタを使用しないがキャッシュドロアを使いたい、複数台のキャッシュドロアを制御したい等の用途に特におすすめです。
デモ機のご用意もございますので、是非お問い合わせください。