
概要
Webサイトの開発などのために、ローカルネットワークに設置したサーバのSSL/TLSサーバ証明書を用意する場合、今までは自己証明書を発行して利用していました。
警告が出るなどの多少の不具合を気にしなければ自己証明書を利用することで事足りていたのですが、ブラウザ通知機能を使う際には、承認された認証局が発行した証明書であることが求められるため、自己証明書だけではエラーになってしまいます。自己認証局の証明書を各ブラウザにインストールするとエラーを回避することができるのですが、検証対象の全てのブラウザにインストールする必要があったり、スマホやタブレットの場合はインストールできないこともあります。
これらの事態を解消するには、有償のSSL/TLSサーバ証明書発行サービスを利用するしかありませんでした。
しかし最近では、Let’s Encryptによる無償のSSL/TLSサーバ証明書発行サービスが利用できるようになりました。
今回はこのサービスを利用して、SSL/TLSサーバ証明書を取得してみたいと思います。
環境
- ローカルネットワーク
- 証明書取得作業用クライアント
- OS
- Ubuntu 18.04 64bit
- Web サーバ
- OS
- Ubuntu 17.10 32bit
- Web サーバ
- Apache 2.4.27
- 証明書取得作業用クライアント
証明書取得作業をWeb サーバで行うこともできますが、今回はあえて別のマシンで行います。
これらのマシンはローカルネットワークに配置されており、インターネットからの接続は出来ません(インターネットにアクセスすることはできます)。
このほかに、以下の環境が必要になります。
- インターネット
- ドメインの所有確認用 Web サーバ
本来ならドメインの所有を確認する手段としてDNSプロトコルを使いたかったのですが、DNSのレコードを編集する権限がないためHTTPプロトコルで行うことにしました。
取得する証明書のドメイン名でアクセスできる(インターネットに公開された)Web サーバを用意しました。
※ DNSレコードを編集する権限をお持ちの場合は、DNSプロトコルでドメインの所有確認をされることをお勧めいたします。
DNSプロトコルを使用した場合は、ワイルドカード証明書を取得することも可能になります。
以下に作業内容を示したいと思います。
certbot をインストール
パッケージ管理ツールaptを使って、証明書取得作業用クライアントにcertbotをインストールします。
certbotはLet’s Encrypt標準の証明書管理エージェントで、証明書取得にかかる一連の処理を実行するのに使います。
$ sudo add-apt-repository -y ppa:certbot/certbot ↵
$ sudo apt update ↵
$ sudo apt install -y certbot ↵
確認します。
$ certbot --version ↵
certbot 0.28.0
証明書を取得
以下のようにして証明書を取得します。
$ sudo certbot certonly --manual --domain <ドメイン> --email <メールアドレス> ↵
Saving debug log to /var/log/letsencrypt/letsencrypt.log
Plugins selected: Authenticator manual, Installer None

- - - - - - - - - - - - - - - - - - - - - - - - - - - - - - - - - - - - - - - -
Please read the Terms of Service at
https://letsencrypt.org/documents/LE-SA-v1.2-November-15-2017.pdf. You must
agree in order to register with the ACME server at
https://acme-v02.api.letsencrypt.org/directory
- - - - - - - - - - - - - - - - - - - - - - - - - - - - - - - - - - - - - - - -
(A)gree/(C)ancel: A ↵

- - - - - - - - - - - - - - - - - - - - - - - - - - - - - - - - - - - - - - - -
Would you be willing to share your email address with the Electronic Frontier
Foundation, a founding partner of the Let's Encrypt project and the non-profit
organization that develops Certbot? We'd like to send you email about our work
encrypting the web, EFF news, campaigns, and ways to support digital freedom.
- - - - - - - - - - - - - - - - - - - - - - - - - - - - - - - - - - - - - - - -
(Y)es/(N)o: N ↵
Obtaining a new certificate
Performing the following challenges:
http-01 challenge for <ドメイン>

- - - - - - - - - - - - - - - - - - - - - - - - - - - - - - - - - - - - - - - -
NOTE: The IP of this machine will be publicly logged as having requested this
certificate. If you're running certbot in manual mode on a machine that is not
your server, please ensure you're okay with that.

Are you OK with your IP being logged?
- - - - - - - - - - - - - - - - - - - - - - - - - - - - - - - - - - - - - - - -
(Y)es/(N)o: Y ↵

- - - - - - - - - - - - - - - - - - - - - - - - - - - - - - - - - - - - - - - -
Create a file containing just this data:

<ワンタイム トークン>

And make it available on your web server at this URL:

http://<ドメイン>/.well-known/acme-challenge/<ファイル名>

- - - - - - - - - - - - - - - - - - - - - - - - - - - - - - - - - - - - - - - -
Press Enter to Continue
ワンタイムトークンとそれにアクセスするためのURLが表示されています。
このワンタイムトークンを先ほどのURLでアクセスできるようにサイトにセットします。
用意が出来たら、Enterを押して先に進めます。
※ HTTPプロトコルを使用した場合、ここに示されたURLを参照して、ワンタイムトークンが一致していることを確認しているようです。
さらに、一致した場合にドメインの所有が確認できたことになるようです。
Waiting for verification...
Cleaning up challenges

IMPORTANT NOTES:
  - Congratulations! Your certificate and chain have been saved at:
    /etc/letsencrypt/live/<ドメイン>/fullchain.pem
    Your key file has been saved at:
    /etc/letsencrypt/live/<ドメイン>/privkey.pem
    Your cert will expire on 2019-04-18. To obtain a new or tweaked
    version of this certificate in the future, simply run certbot
    again. To non-interactively renew *all* of your certificates, run
    "certbot renew"
  - Your account credentials have been saved in your Certbot
    configuration directory at /etc/letsencrypt. You should make a
    secure backup of this folder now. This configuration directory will
    also contain certificates and private keys obtained by Certbot so
    making regular backups of this folder is ideal.
  - If you like Certbot, please consider supporting our work by:

    Donating to ISRG / Let's Encrypt:   https://letsencrypt.org/donate
    Donating to EFF:                    https://eff.org/donate-le
※ Are you OK with your IP being logged?
の質問にNと答えると、処理が中断しました。
同じコマンドを実行すれば、中断したところから処理が再開されます。
確認します。
$  sudo ls -la /etc/letsencrypt/live/<ドメイン> ↵
total 12
drwxr-xr-x 2 root root 4096 Jan 18 06:20 .
drwx------ 3 root root 4096 Jan 18 06:20 ..
-rw-r--r-- 1 root root  692 Jan 18 06:20 README
lrwxrwxrwx 1 root root   54 Jan 18 06:20 cert.pem -> ../../archive/<ドメイン>/cert1.pem
lrwxrwxrwx 1 root root   55 Jan 18 06:20 chain.pem -> ../../archive/<ドメイン>/chain1.pem
lrwxrwxrwx 1 root root   59 Jan 18 06:20 fullchain.pem -> ../../archive/<ドメイン>/fullchain1.pem
lrwxrwxrwx 1 root root   57 Jan 18 06:20 privkey.pem -> ../../archive/<ドメイン>/privkey1.pem
ファイルがいくつか作成されました。
liveディレクトリを参照しているので、シンボリックリンクが表示されています。
それぞれのファイルは、
- cert.pem
- サーバ証明書ファイル
- chain.pem
- 中間証明書ファイル
- fullchain.pem
- サーバ証明書と中間証明書が一つになったファイル
- privkey.pem
- 秘密鍵ファイル
です。
ここからリンク元のファイルを見つけて、Web サーバに転送して利用することになります。
Web サーバに証明書をインストール
取得した証明書、秘密鍵、中間証明書などを Web サーバに転送して、Apache の設定ファイルを編集します。
これらのファイルは、/etc/apache2/certs/にコピーしたものとします。
/etc/apache2/sites-available/default-ssl.confのSSLCertificateFileとSSLCertificateKeyFileを次のように設定します。
    SSLCertificateFile      /etc/apache2/certs/fullchain.pem
    SSLCertificateKeyFile   /etc/apache2/certs/privkey.pem
編集が終わったら、サービスを再起動します。
$ sudo service apache2 restart ↵
ブラウザで証明書が適用されていることを確認しましょう。
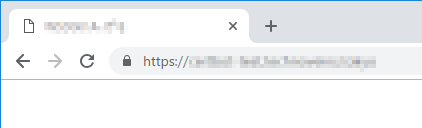
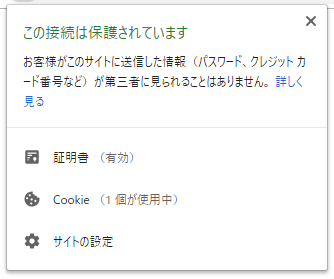
正しく認識されているようです。
ここで、一つ注意が必要です。
既にお気づきとは思いますが、ここで取得した証明書のドメイン名は、インターネットに公開されています。普通にDNSを利用して名前解決を行うと、ドメインの所有確認用 Web サーバのIPアドレスを取得してしまいます。
しかし証明書をインストールしたマシンは、ローカルネットワークに存在しておりインターネットからは接続できません。当然、IPアドレスも違っています。
そこで、クライアントのhostsファイルを編集して名前解決を行います。一般に、hostsファイルはDNSより優先して適用されますので、ローカルネットワークに設置した Web サーバにアクセスできるようになります。
また、ローカルにDNSサーバがあればそのDNSサーバに登録することで、ローカルネットワークに接続された全てのクライアントに対して名前解決をすることができます。
証明書を更新
ところで、Let's Encrypt で取得した証明書の有効期限はいつまででしょうか?
証明書を取得した際に表示されたIMPORTANT NOTESに示されていますが、
Your cert will expire on 2019-04-18.
となっています。作業を行ったのが2019年1月18日ですので、90日間有効ということになります。それまでに、再度証明書を取得する必要があります。
更新は、以下のようにします。
$ sudo certbot certonly --manual --domain <ドメイン> --email <メールアドレス> --force-renewal --text ↵
Saving debug log to /var/log/letsencrypt/letsencrypt.log
Plugins selected: Authenticator manual, Installer None
Renewing an existing certificate
Performing the following challenges:
http-01 challenge for <ドメイン>

- - - - - - - - - - - - - - - - - - - - - - - - - - - - - - - - - - - - - - - -
NOTE: The IP of this machine will be publicly logged as having requested this
certificate. If you're running certbot in manual mode on a machine that is not
your server, please ensure you're okay with that.

Are you OK with your IP being logged?
- - - - - - - - - - - - - - - - - - - - - - - - - - - - - - - - - - - - - - - -
(Y)es/(N)o: Y ↵

- - - - - - - - - - - - - - - - - - - - - - - - - - - - - - - - - - - - - - - -
Create a file containing just this data:

<ワンタイム トークン>

And make it available on your web server at this URL:

http://<ドメイン>/.well-known/acme-challenge/<ワンタイム トークン ファイル名>

- - - - - - - - - - - - - - - - - - - - - - - - - - - - - - - - - - - - - - - -
Press Enter to Continue ↵
Waiting for verification...
Cleaning up challenges

IMPORTANT NOTES:
  - Congratulations! Your certificate and chain have been saved at:
    /etc/letsencrypt/live/<ドメイン>/fullchain.pem
    Your key file has been saved at:
    /etc/letsencrypt/live/<ドメイン>/privkey.pem
    Your cert will expire on 2019-04-20. To obtain a new or tweaked
    version of this certificate in the future, simply run certbot
    again. To non-interactively renew *all* of your certificates, run
    "certbot renew"
  - If you like Certbot, please consider supporting our work by:

    Donating to ISRG / Let's Encrypt:   https://letsencrypt.org/donate
    Donating to EFF:                    https://eff.org/donate-le
確認します。
$  sudo ls -la /etc/letsencrypt/live/<ドメイン> ↵
total 12
drwxr-xr-x 2 root root 4096 Jan 20 06:51 .
drwx------ 3 root root 4096 Jan 18 06:20 ..
-rw-r--r-- 1 root root  692 Jan 18 06:20 README
lrwxrwxrwx 1 root root   54 Jan 20 06:51 cert.pem -> ../../archive/<ドメイン>/cert2.pem
lrwxrwxrwx 1 root root   55 Jan 20 06:51 chain.pem -> ../../archive/<ドメイン>/chain2.pem
lrwxrwxrwx 1 root root   59 Jan 20 06:51 fullchain.pem -> ../../archive/<ドメイン>/fullchain2.pem
lrwxrwxrwx 1 root root   57 Jan 20 06:51 privkey.pem -> ../../archive/<ドメイン>/privkey2.pem
シンボリックリンクのリンク元ファイルが変わっていることに気が付いたと思います。リンク元ファイルの番号部がカウントアップしています。
新たに取得したこれらのファイルを Web サーバに転送して、証明書をインストールします。
ここで紹介する内容は、弊社で確認した一例です。
本ページを参考に作業をされ、何らかのトラブルや損失・損害等が発生しましても一切責任を負えません。自己責任でお願いします。