LEDND configuration utility
|
How to operate each setting
This setting utility operates with a USB-COM connection. A driver is required to use the USB-COM connection.
Click here
"CP210x Universal Windows Driver" to download and install the driver.
|
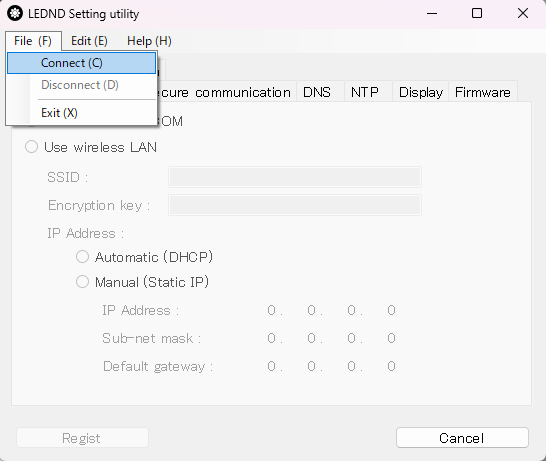
■ Connect to the LEDND main unit from the setting utility |
Connect the LEDND main unit and PC with a MicroUSB cable.
Launch the configuration utility and click "File" - "Connect". |
|
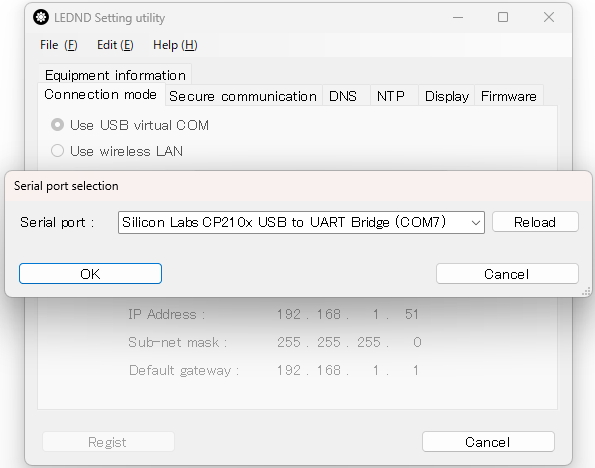
| Select the serial port and click OK. |
|
|
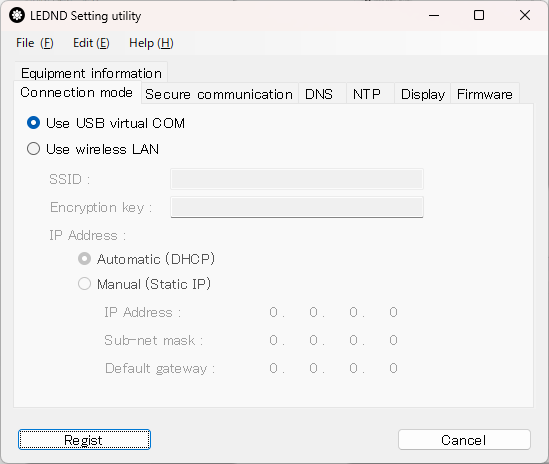
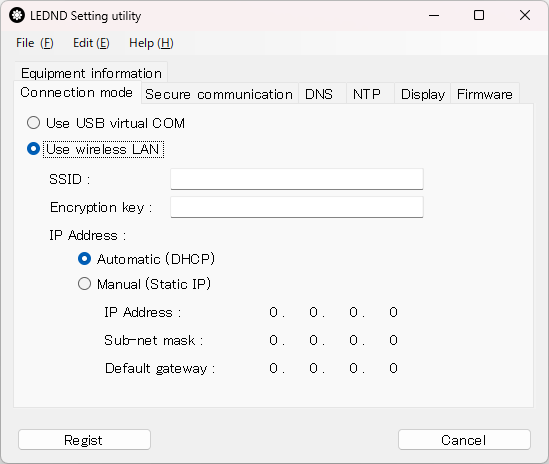
■ Connection mode |
Specify "USB virtual COM" or "wireless LAN" as the connection mode.
The factory setting is "USB virtual COM". |
|
| To use "wireless LAN", enter the required items such as "SSID" and press the "Regist" button. |
|
|
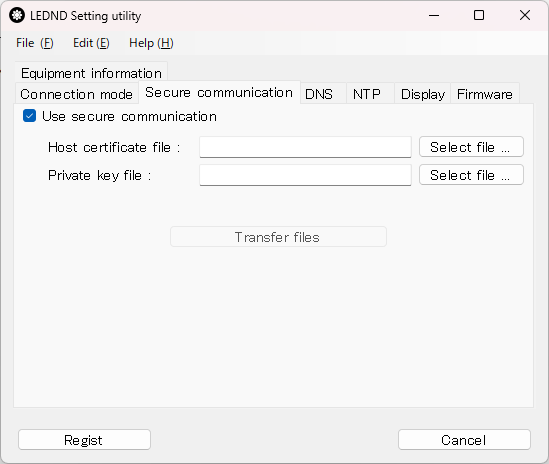
■ Encrypted communication |
When the connection mode is "wireless LAN", encrypted communication (HTTPS) can be used.
To use HTTPS to access LEDND, upload the "host certificate" and "private key" files. |
|
|
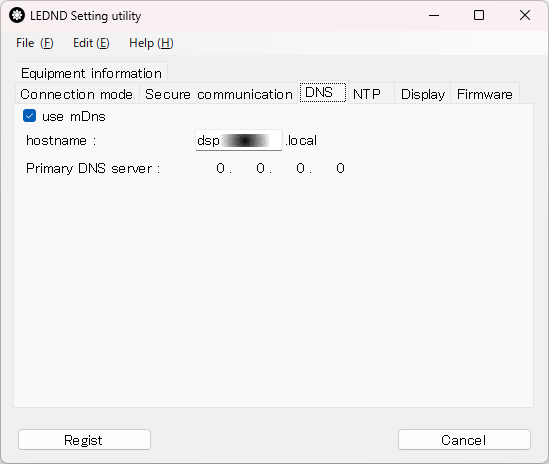
■ DNS |
Set this when accessing LEDND by domain name instead of IP address.
*This feature is not available on Android.
|
|
|
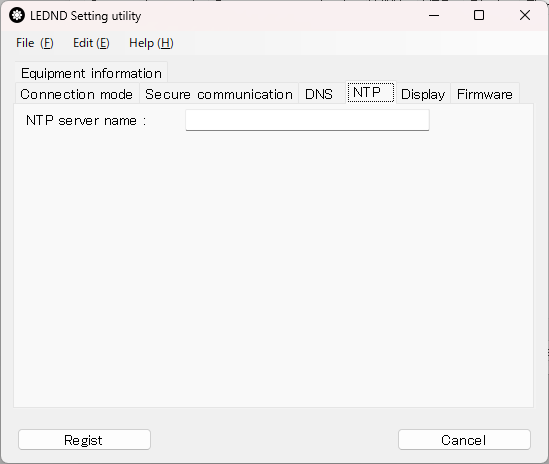
■ NTP |
When using a wireless LAN connection, the time can be obtained from the NTP server and displayed on the LEDND.
After setting the NTP server name, send the time display command (0x1f 0x55) to LEDND to display the current time.
(NTP server distributes current time information on a network.)
|
|
|
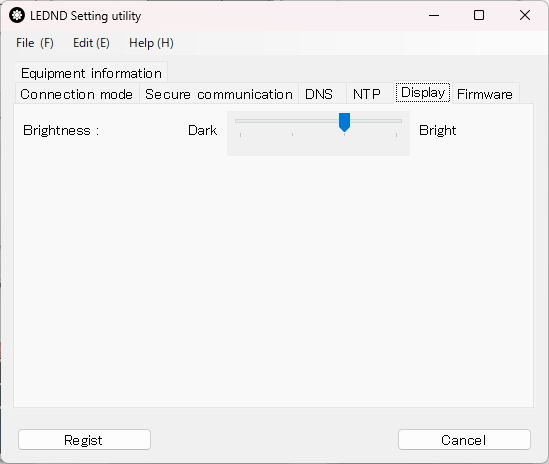
■ Display |
Brightness can be set with values from 1 to 4.
The factory default brightness is "3" for LEDND4 and "4" for LEDND7.
|
|
|
■ Firmware |
Firmware (hex file) can be uploaded to update the firmware of the device.
The latest firmware is downloaded from our download website.
|

|
|
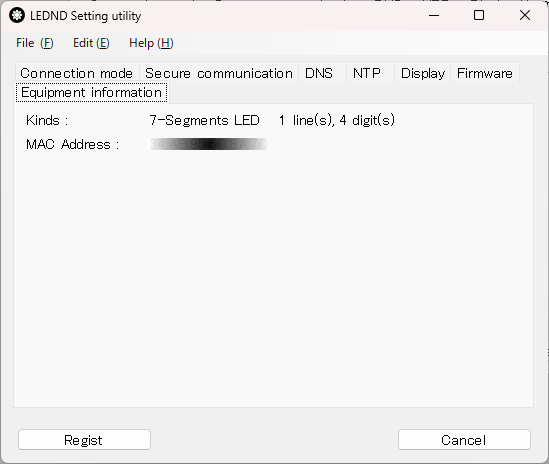
■ Equipment information |
Equipment information is displayed.
|
|
|
|